【Java】S2Dao SQLアノテーション
S2Daoでデータベースアクセス。DoltengプラグインをインストールするときH2データベースがインストールされ、デフォルトでテーブルも作成される。そのテーブルへのアクセスを試してみる。
search.html
ID:<input type="text" id="empId" /><br />
<input type="button" id="doSearcEmpId" value="検索"/><br />
<br />
ID数検索:<input type="button" id="doSearchCount" value="計算" />
SearchPage.java
package com.xxx.web.search;
public class SearchPage {

	public Long empId;
	public Integer empCount;

	public Long getEmpId() {
		return empId;
	}
	public void setEmpId(Long empId) {
		this.empId = empId;
	}
	public Class<?> doSearcEmpId() {
		return ResultListPage.class;
	}
	public Class<?> doSearchCount(){
		return ResultCountPage.class;
	}
	public Class<?> initialize() {
		return null;
	}
	public Class<?> prerender() {
		return null;
	}
}
自動生成してくれるDaoインターフェースをいじる。レコード数をカウントするメソッド(count())を追加。SQLアノテーション(@Sql〜)で、SQLをそのまま書けばいいとのこと。
EmpDao.java
package com.xxx.dao;

import org.seasar.dao.annotation.tiger.Arguments;
import org.seasar.dao.annotation.tiger.S2Dao;
import org.seasar.dao.annotation.tiger.Sql;
import com.xxx.entity.Emp;

@S2Dao(bean=Emp.class)
public interface EmpDao {
	public Emp[] selectAll();

	@Arguments("ID")
	public Emp selectById(Long id);

	public int insert(Emp emp);

	public int update(Emp emp);

	public int delete(Emp emp);

	@Sql("SELECT count(*) FROM emp")
	public int count(Emp emp);
}
んで、結果表示のページ。IDで検索した結果を表示するhtml。
ResultList.html
ID:<span id="empId" /><br />
<table border="1" class="tablebg">
	<thead>
		<tr>
			<th>社員番号</th>
			<th>社員名</th>
			<th>上司ID</th>
			<th>入社日</th>
			<th>給料</th>
			<th>部門ID</th>
		</tr>
	</thead>
	<tbody id="empItems">
		<tr id="empRow" class="row_even">
			<td class="right"><span id="empNo">empNo</span></td>
			<td><span id="empName">empName</span></td>
			<td class="right"><span id="mgrId">mgrId</span></td>
			<td><span id="hiredate">hiredate</span></td>
			<td class="right"><span id="sal">sal</span></td>
			<td class="right"><span id="deptId">deptId</span></td>
		</tr>
	</tbody>
</table>
IDで検索して、その結果を出力する。
ResultListPage.java
package com.xxx.web.search;

import com.xxx.entity.Emp;
import com.xxx.web.emp.AbstractEmpPage;

public class ResultListPage  extends AbstractEmpPage {

	//public Emp[] empItems;
	public Emp empItems;
	public Long empId;

	public Class<?> prerender() {
		//empItems = empDao.selectAll();
		//long empId = 1;
		empItems = empDao.selectById(empId);
		empDxo.convert(empItems, this);
		return null;
	}
}
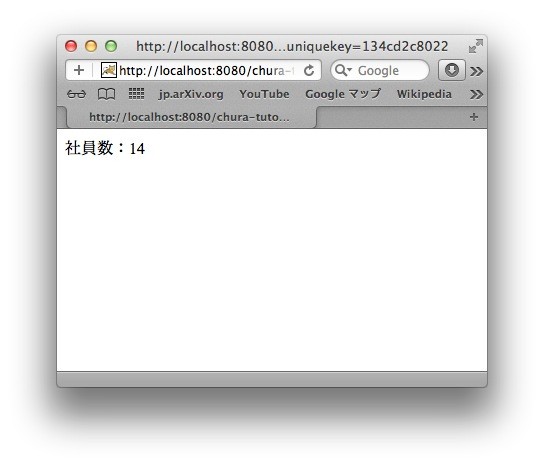
今度はカウント数を。ResultCount.html
社員数:<span id="empCount" >count</span>
ResultCountPage.java
package com.xxx.web.search;

import com.xxx.web.emp.AbstractEmpPage;
import com.xxx.entity.Emp;

public class ResultCountPage extends AbstractEmpPage {

	public Integer empCount;
	public Emp emp;

	public Integer getEmpCount() {
		return empCount;
	}
	public void setEmpCount(Integer empCount) {
		this.empCount = empCount;
	}
	public Class<?> initialize() {
		return null;
	}
	public Class<?> prerender() {
		empCount = empDao.count(emp);
		empDxo.convert(empCount, this);
		return null;
	}
}
一応、初歩的なとこは、なんとか。次からはCRUDを。
【Java】Apache Velocity & Commons Email
Apache VelocityというテンプレートエンジンとApache Commons Emailを使って、テンプレートによるメール送信を書いてみた。
mailform.htmlの中
名前:<input type="text" id="strName" /><br />
メールアドレス:<input type="text" id="strAddress1" />@<input type="text" id="strAddress2" /><br />
商品名:<input type="text" id="strProduct"/><br />
商品数:<input type="text" id="intProduct"/><br />
<input type="button" id="doPurchase" value="購入" /><br />
上記htmlのボタンで指定しているMailFormPage.java内のdoPurchaseメソッド
public Class<?> doPurchase() {
	String msg = new String();

	// Property
	Properties prop = new Properties();
	prop.setProperty("resource.loader", "class");
	prop.setProperty("class.resource.loader.class", "org.apache.velocity.runtime.resource.loader.ClasspathResourceLoader");
	prop.setProperty("class.resource.loader.cache", "true");
	prop.setProperty("input.encoding", "UTF-8");

	// VelocityEngine
	VelocityEngine engine = new VelocityEngine();
	engine.init(prop);

	VelocityContext cntxt = new VelocityContext();
	cntxt.put("strName", getStrName());
	cntxt.put("strProduct", getStrProduct());
	cntxt.put("intProduct", getIntProduct());

	// Template
	Template template = engine.getTemplate("mail/mail_template.vm");

	StringWriter writer = new StringWriter();
	template.merge(cntxt, writer);
	msg = writer.toString();

	try {
		SimpleEmail email = new SimpleEmail();

		StringBuilder mail_address = new StringBuilder();

		mail_address.append(getStrAddress1());
		mail_address.append("@");
		mail_address.append(getStrAddress2());
		String _address = mail_address.toString();

		email.setHostName("ホストサーバ");
		email.addTo(_address, "To : " + getStrName()); // 宛先アドレス
		email.setFrom(_address, "From : " + getStrName()); // 送信者アドレス(自分自身にしている)
		email.setSubject("商品購入確認メール");
		email.setMsg(msg);
		email.setCharset("ISO-2022-JP");

		email.send();

	} catch (Exception e) {
		e.printStackTrace();
	}

	return FinishPage.class;

}
Velocityで使うテンプレートファイルmail_template.vm
${strName}様

※このメールは確認メールです

この度は弊社商品${strProduct}を
${intProduct}個ご購入いただき、誠にありがとうございます。
${}のトコロに、動的に値を送り込んでいるわけです。
データベースも使っていないしセキュリティも考慮していないのだが、とりあえず出来た。次は、データベースへの登録なども絡めて。
【Java】Apache Commons Email
昨夜のCodecを、webでもでけたので、次。今度もApache CommonsのEmail。
import org.apache.commons.mail.*;
〜
try {
    SimpleEmail email = new SimpleEmail();

    email.setHostName("ホスト名");
    email.addTo("送信先メールアドレス", "宛先名");
    email.setFrom("送信者メールアドレス", "送信者名");
    email.setSubject("メールタイトル");
    email.setMsg("メール本文");
    email.setCharset("ISO-2022-JP");

    email.send();
} catch (Exception e) {
    e.printStackTrace();
}
Seasar2(DoltengプラグインでTeeda + S2Dao)でさくさくっと。ページクラス内メソッドに上記コードを書いてやると、メール送信を確認できました。ただし、OracleのJavaMail APIが必要なので、Add External Jarでjarファイルを追加してやること。
try〜catchの例外は、ほんとはEmailExceptionをthrowします。
できれば明日は、Apache Velocityで、メールのテンプレートに文字列を流し込んで、それを送信できるようにしたいなあ。
【Java】Apache Commons Codec
Commons Codecをいじってみた。とりあえず出来た。
import org.apache.commons.codec.binary.Base64;

public class CodecTest {

    public static void main(String[] args){

        Base64 base64 = new Base64();

        String orgStr = "abcdefg";
        byte[] inByte = orgStr.getBytes();

        // Encode
        byte[] outBtye = base64.encodeBase64(inByte);

        String encodedStr = new String(outBtye);
        System.out.println(encodedStr);

        try {
            // Decode
            byte[] decodedData = base64.decode(encodedStr);
            String decodedStr = new String(decodedData, "UTF-8");
            System.out.println(decodedStr);

        } catch (java.io.UnsupportedEncodingException e) {

            e.printStackTrace();

        }
    }
}
次にやるとしたら、webでも使えるようにってとこで。URLエンコードでしたっけ。
【Objective-C】Event Kit with GCD
「eventsMatchingPredicate:メソッドは同期的であるため、アプリケーションのメインスレッドで 実行しないでください。非同期動作の場合は、dispatch_async関数、またはNSOperationオブジェ クトを使用して、ほかのスレッドでメソッドを実行します。」
と、Event Kitのドキュメントにあったので、さっそく
- (void)viewDidLoad {
	self.title = @"Events List";

	// Initialize an event store object with the init method. Initilize the array for events.
	self.eventStore = [[EKEventStore alloc] init];

	self.eventsList = [[NSMutableArray alloc] initWithArray:0];

	// Get the default calendar from store.
	self.defaultCalendar = [self.eventStore defaultCalendarForNewEvents];

	//	Create an Add button
	UIBarButtonItem *addButtonItem = [[UIBarButtonItem alloc] initWithBarButtonSystemItem:
							    UIBarButtonSystemItemAdd target:self action:@selector(addEvent:)];
	self.navigationItem.rightBarButtonItem = addButtonItem;
	[addButtonItem release];


	self.navigationController.delegate = self;

	// Fetch today's event on selected calendar and put them into the eventsList array
	dispatch_queue_t aQueue = dispatch_get_global_queue(DISPATCH_QUEUE_PRIORITY_DEFAULT, 0);
	dispatch_async(aQueue, ^{
			[self.eventsList addObjectsFromArray:[self fetchEventsForToday]];
			dispatch_async(dispatch_get_main_queue(), ^{
				[self.tableView reloadData];
			});
	});
}
デバイスで実行してみたものの、さっぱり変化がわからない
あ、そうか!Instrumentsを(以下略
【Objective-C】Event Kit
ふと思い立って、iOSのカレンダーイベントを拾って来るにはどうすればいいかな、と
Event Kitというフレームワークがあるそうです
サンプルを落としてきて、ソースを見てみたところ、以下の箇所でイベントを拾ってきてるらしい
// Fetching events happening in the next 24 hours with a predicate, limiting to the default calendar
- (NSArray *)fetchEventsForToday {

	NSDate *startDate = [NSDate date];

	// 1日を秒で表しておく
	// endDate is 1 day = 60*60*24 seconds = 86400 seconds from startDate
	NSDate *endDate = [NSDate dateWithTimeIntervalSinceNow:86400];

	// 検索条件らしきものを作る
	// ここでは開始日、終了日を指定
	// Create the predicate. Pass it the default calendar.
	NSArray *calendarArray = [NSArray arrayWithObject:defaultCalendar];
	NSPredicate *predicate = [self.eventStore predicateForEventsWithStartDate:startDate endDate:endDate
													 calendars:calendarArray];
	// 検索条件でフェッチ
	// 結果はArrayで返って来る
	// Fetch all events that match the predicate.
	NSArray *events = [self.eventStore eventsMatchingPredicate:predicate];

	return events;
}
predicateを自由に作ることができればいいのかな、と
任意のイベント、内容だけを拾ってくるとか
【Objective-C】ポリモーフィズム
Javaのように書けない。書き方が悪いのか、そもそも言語的にそういうものなのかが、分からない。
interface Player {
    public void play();
}

class iPod implements Player {
    public void play(){
        System.out.println("Apple");
    }
}

class Walkman implements Player {
    public void play(){
        System.out.println("SONY");
    }
}

public class Audio {
    public static void main(String[] args){
        Walkman wlkmn = new Walkman();
        iPod ipod = new iPod();
        Player plyr = ipod;
        plyr.play();
    }
}
Audioクラスでの指定の仕方で、"Apple"と出るか"SONY"と出るかを決められるじゃん。こういう書き方をそもそもいつどこでするのっていうのもあると思うけど。
Objective-Cでは、このようなポリモーフィズムはどのように実現しているのかが、わからない。


